Detachable Shoulders and Arms Custom Tutorial
How to use LEGO bits to create detachable shoulders

Please wait...
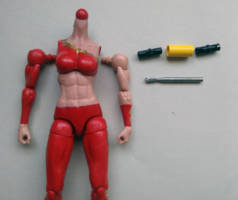
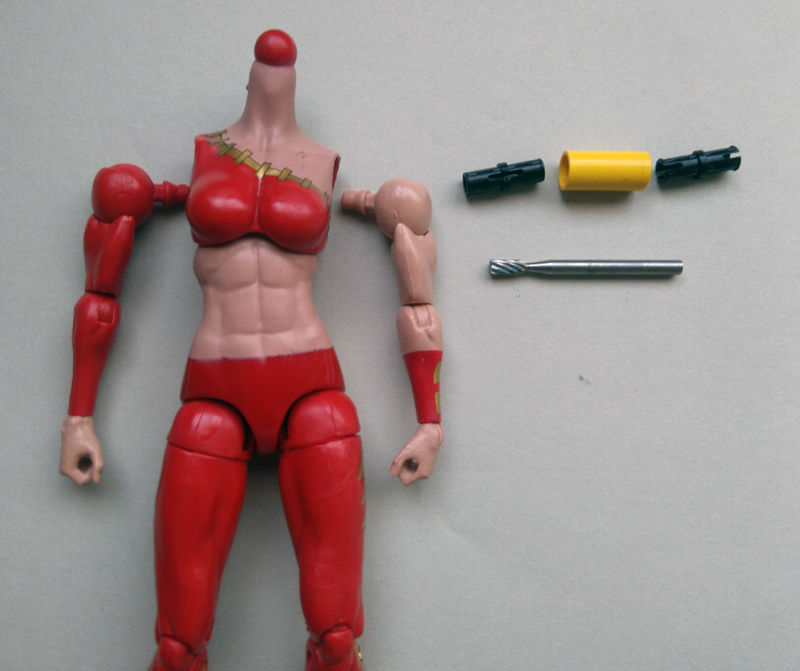
Sometimes you may want to use arms with a figure that has incompatible parts. Maybe you want to easily add a coat, or simply move the arms on a custom without scraping off paint, all good reasons to try this mod.
This method is easy to do on figures with solid torsos, like the female Marvel Legends, but the ones with hollow torsos may require alternate parts and some putty to secure them.
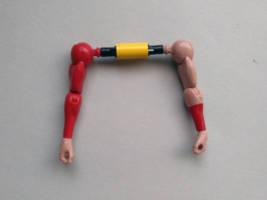
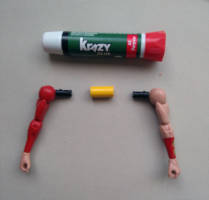
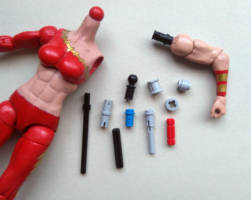
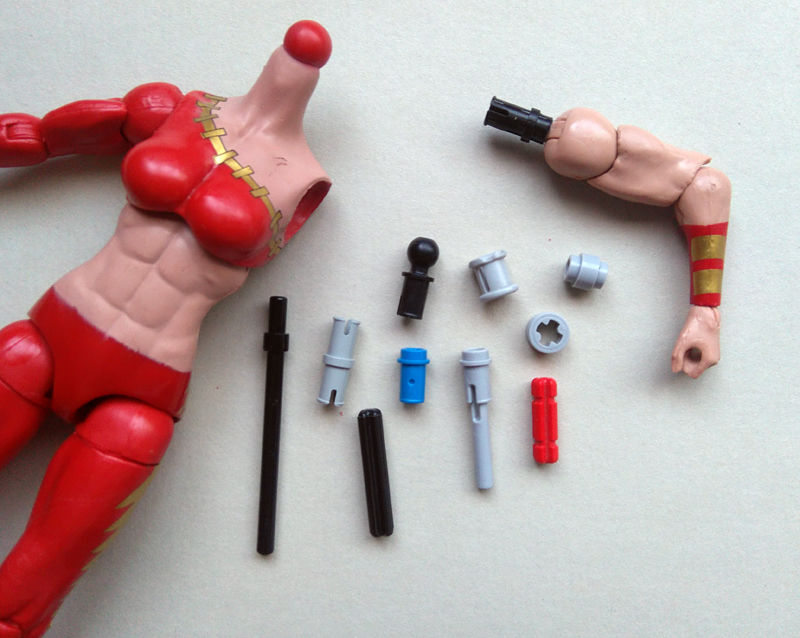
LEGO parts needed:
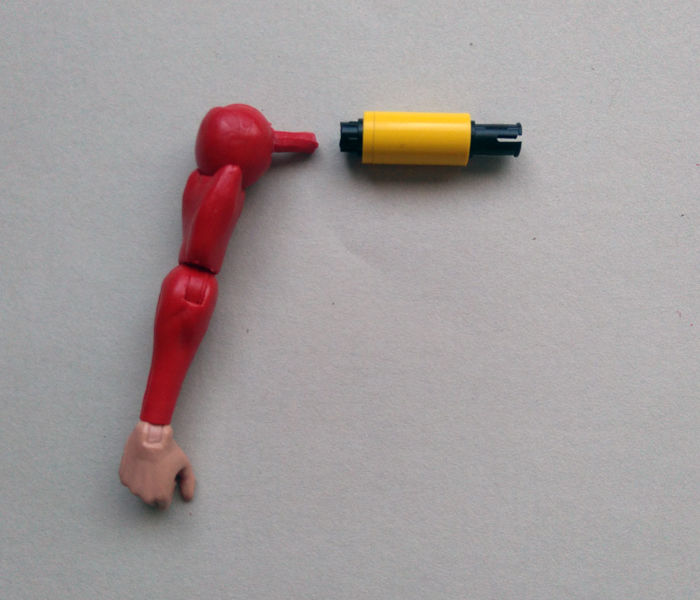
•Technic connector
•2 Technic pins (with friction ridges)
Make sure to use pins with friction ridges or else the arms will be floppy.
Tools needed:
•Rotary tool with grinding bit
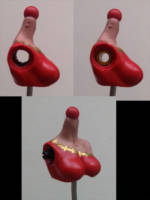
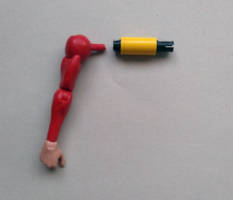
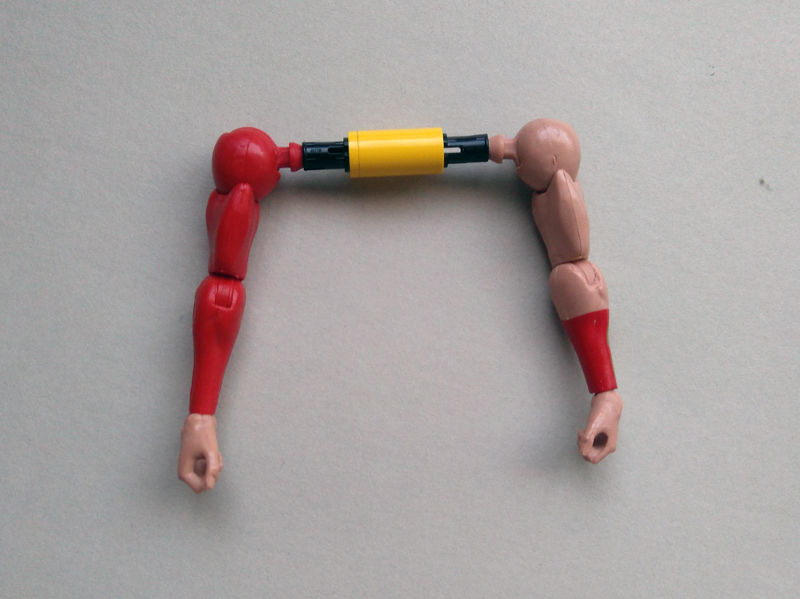
Here's the goal, you want to get the LEGO assembly into the torso. Then modify the arm pegs to fit into the pins.
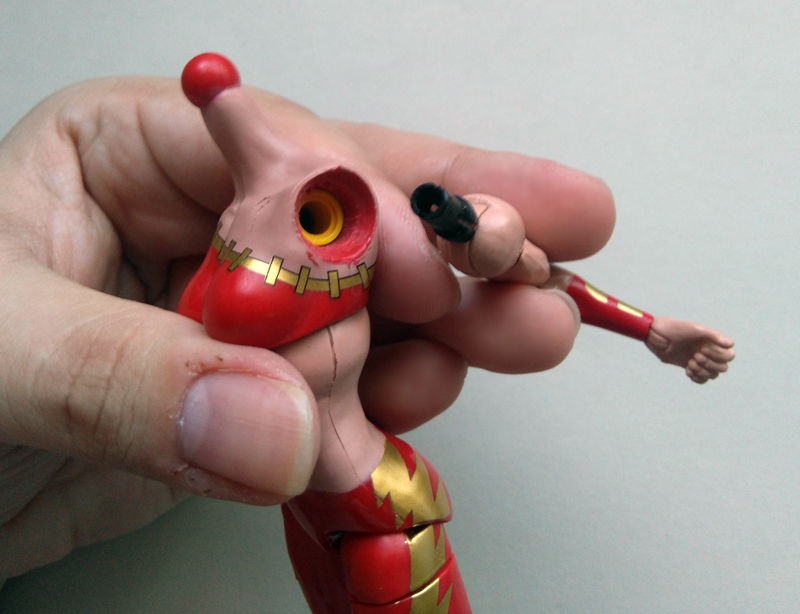
Widen the arm holes to be slightly smaller than the yellow Technic connector so when you slide it in it's a snug fit. This is a lot easier to do with a drill press or fat drill bit than that dinky one I used lol.
Don't glue this in there yet.
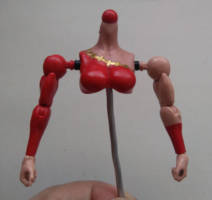
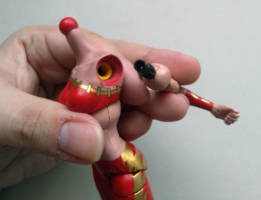
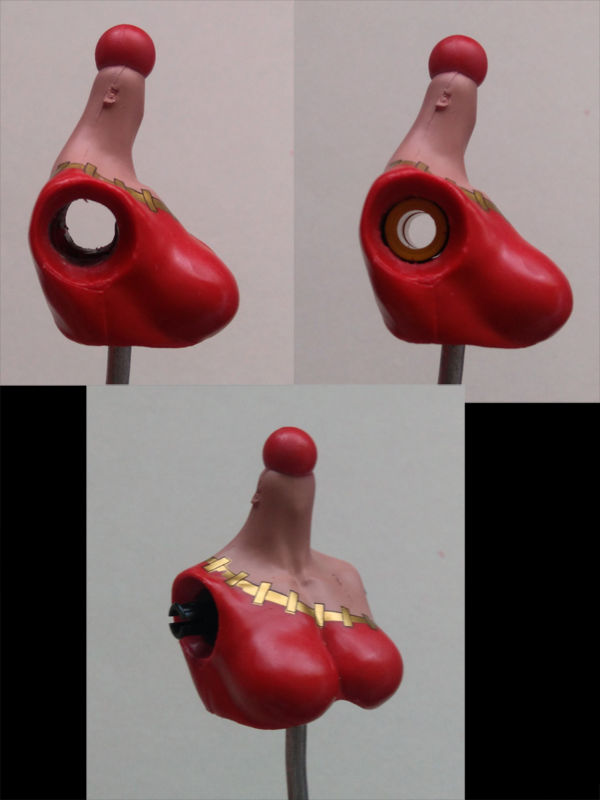
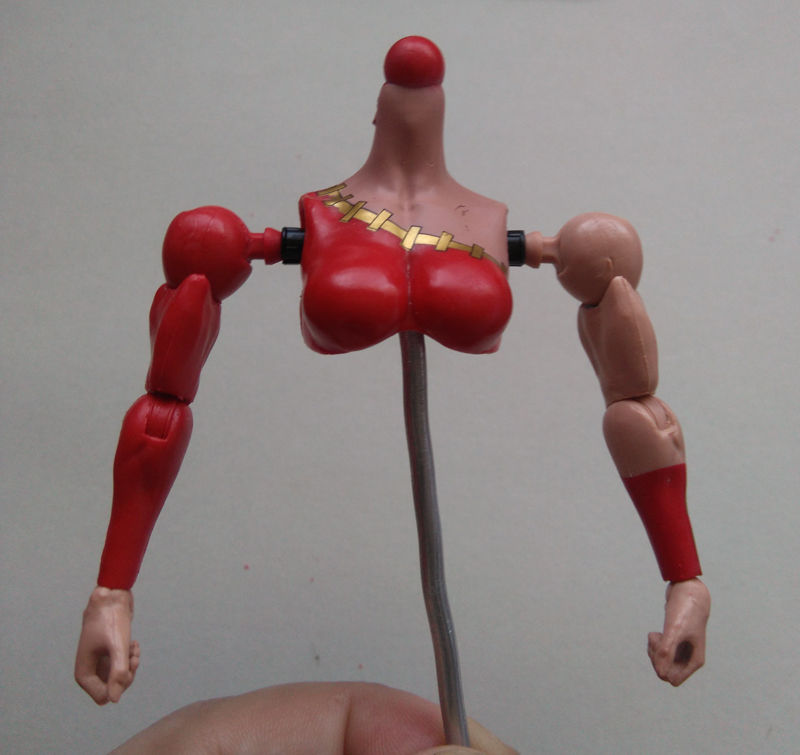
Clearly we have to narrow the shoulder spacing!
Grind down the mushroom part of the arm's peg, and shave the sides until it slides snugly all the way into the Technic pin. Don't shorten the arm's peg.
Do a test fit again like in Picture 4, center the shoulders. This should be easy since you didn't glue the yellow connector, so it should be able to shift sideways.
If the shoulders are still too far apart, cut the black pins down to the right length.
Do a test fit again and keep trimming the pins as needed. I left about 1mm of extra space between the shoulders and the body so paint won't scrape off when I move the arms later.
Once you're happy with all the spacing, glue the trimmed ends of the pins to the arm pegs. Make sure this is secure, weld them together if you have to. It doesn't have to be pretty, just don't mess up the ends that plug into the yellow connector.
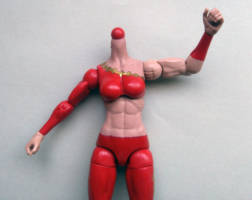
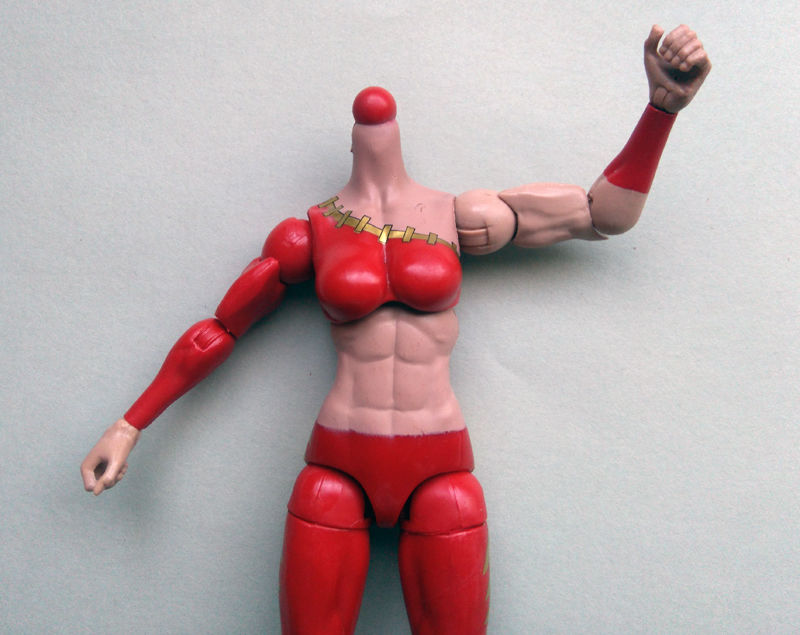
Here's a quick look at what the finished mod looks like.
And there we go, we retained all articulation and made customizing the figure easier.
Here's a look at some other LEGO bits that you might find useful.
There are lots of different ways to create articulation, and even fix broken joints, it's just a matter of finding something that will fit.
Disclaimer
Customize at your own risk!
Customizing can be a fun, but dangerous hobby. These tutorials are contributed by other customizers. Some of the things recommended in the tutorials may be dangerous, such as the use of boiling water or sharp objects. You shouldn't attempt anything mentioned without adult permission and supervision. Figure Realm and/or the authors of the tutorials are not liable for any injuries or damages occurring from any attempt to follow suggestions in these tutorials.
User Comments
Custom on eBay
Previous / Next Custom Tutorial


 Update Your Tutorial

Some transformers have ratcheting joints too.