Shoulder Joint Protection Custom Tutorial
How to protect ball and socket joints from paint rub
This custom tutorial was contributed by Darththomas
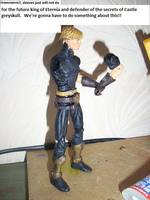
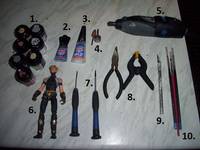
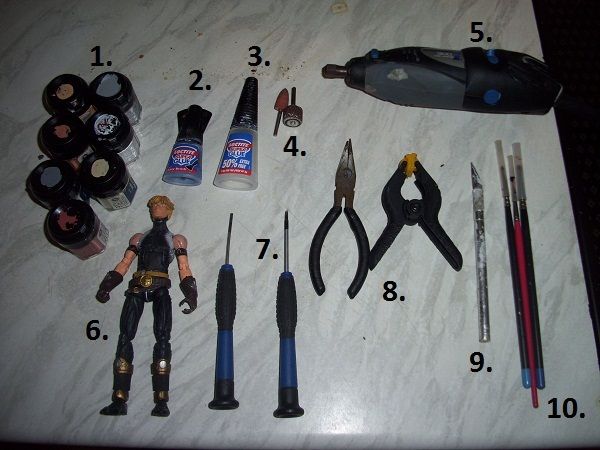
Hey all, back with another tutorial that I hope you'll find useful. This time I'm gonna show you how I tackle the age old problem of shoulder paint rub, so without further ado, I'm gonna explain the first picture which is what you will need.
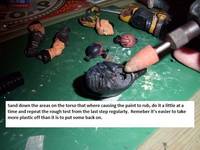
1.Paints
2.Brush on superglue
3.Standard superglue
4.Rotary tool bits
5.Dremmel or rotary tool
6.Your subject
7.Screwdrivers or similar objects
8.Pliers or clamp to hold your pieces while heating them
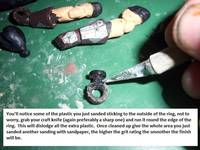
9.Craft Knife
10.Paint brushes

Also the obvious stuff such as water (to wash your brushes)and newspaper (to protect your work area).

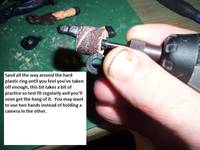
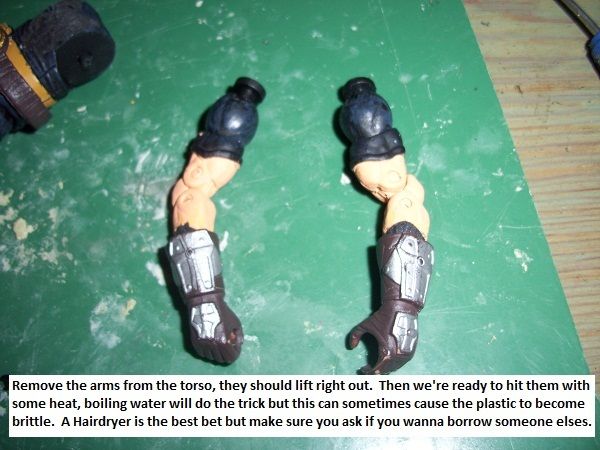
Some parts of this tutorial can be a bit tricky to get right so if you're unsure I recommend practicing on some junk figures first.


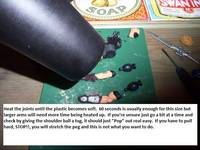
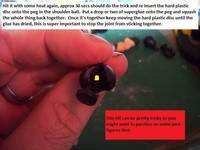
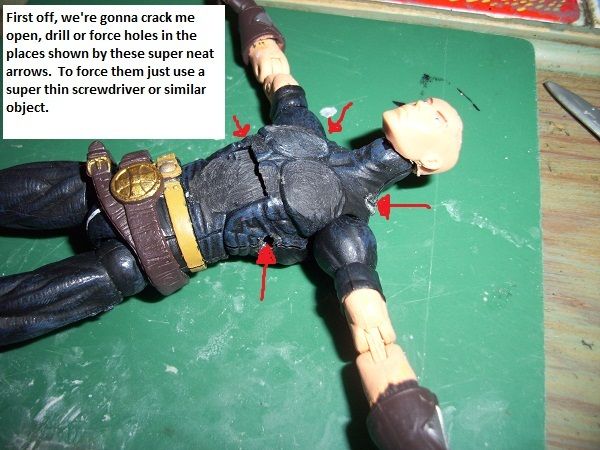
I should also mention that not all shoulder balls are the same, some DC figures have an extra soft plastic ring moulded onto the shoulder ball, this soft plastic ring fits inside the hard plastic disc and can make this method pretty difficult. Just check first by heating up the ball and prying the two halves apart slightly using a blunt object.
After all this and a complete paint job I seal my customs with Games Workshop Satin purity seal or Vallejo Satin Purity seal, there are other brands but these are the only ones I've used. As stated above this will get rid of the shine caused by the superglue.

I hope you found this tutorial useful, any questions just leave a comment and I'll do my best to answer them.
Disclaimer
Customize at your own risk!

Customizing can be a fun, but dangerous hobby. These tutorials are contributed by other customizers. Some of the things recommended in the tutorials may be dangerous, such as the use of boiling water or sharp objects. You shouldn't attempt anything mentioned without adult permission and supervision. Figure Realm and/or the authors of the tutorials are not liable for any injuries or damages occurring from any attempt to follow suggestions in these tutorials.

User Comments
avatar
Apocalypse1986 -
Thursday, February 21, 2019
Also: how the hell do they seal the hinge in the shoulder in the first place?!!?!! Seems like an unnecessary extra (couple?) of steps 🤷‍♂️
avatar
Darththomas -
Tuesday, February 26, 2019
Hey, I'm afraid I have no knowledge of those joints. Maybe just a heat and pull affair, sorry that's pretty useless but I've never worked on one
avatar
Apocalypse1986 -
Thursday, February 21, 2019
Hey all; I’m trying to disassemble a fugitive predator and I got it all except the shoulder, elbow, and knee joints. The hinges seem to (somehow?!?!) be molded into the pieces.
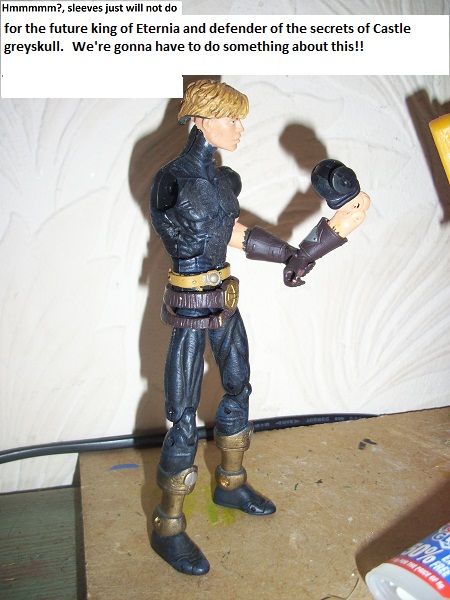
Does anyone know how to get the hinges out of them?
avatar
J sosha57 -
Tuesday, January 16, 2018
Will this work on butterfly joints??
avatar
Darththomas -
Wednesday, January 24, 2018
Yes it does work but may need further work on the butterfly parts, I'd grind out the outer parts of the joints leaving a raised area around the peg hole. If you can get away with it I'd try and not use paint and super glue as you'd need to heat it to get the arm in and that could wreck the paint
avatar
johnnynitro1 -
Friday, March 24, 2017
Should I coat the entire disc with a very thin layer of superglue before I put the disc back inside? Is that a good idea?
avatar
Darththomas -
Friday, March 24, 2017
I've never done that myself, never needed too if the gap is big enough ..... might work though, experimenting its good
avatar
Darththomas -
Friday, March 24, 2017
Actually, definitely don't do the entire disc, the glue would end up flaking off every time you moved it. You could maybe just coat the flat surface, the bit that ends up visible
avatar
johnnynitro1 -
Wednesday, March 8, 2017
Hey guys, does anyone know if I should heat up the shoulder ball before trying to make a cut to pull the hard disc out?
avatar
Darththomas -
Thursday, March 9, 2017
Yup, hit them with a short blast, should be nice and soft so you don't have to apply a ton of pressure to cut it
avatar
thenewmutant -
Wednesday, June 10, 2015
Tutorial came in very handy thank you!
avatar
Cosmic Fantasy Customs -
Wednesday, September 14, 2011
man this is so helpful, your skills are amazing. your tutorials are top notch my friend and your motu customs are looking beautiful can't wait to see more. A+
avatar
Automatauntaun -
Tuesday, September 13, 2011
I noticed you have a numbered chart, but am I missing the key? Only complaint.
avatar
Darththomas -
Tuesday, September 13, 2011
It's in the intro text at the top dude
avatar
Automatauntaun -
Tuesday, September 13, 2011
Well done! I just shaved them in the socket but this is super helpful and is gonna help me fix part of my venorpian tail that broke!?
avatar
Darththomas -
Tuesday, September 13, 2011
Cheers bud, yeah I used to do that too but once you get the hang of it, this way is much easier imo and neater too. Glad It helped!
avatar
pulpyfiction -
Tuesday, September 13, 2011
Great tutorial, and that looks like it's going to be an amazing prince adam! I also have to say I can't wait to see your battle cat when it's done!
avatar
Darththomas -
Tuesday, September 13, 2011
Thanks pulpy, I finally get what you meant on your bc when you talked about the ridiculous holes on his legs, I mean, what the ....??
Write a new Comment
New Comment...
biggrin  smile  sad  surprised  confused  cool  badgrin  mad  razz  redface  cry  evil  rolleyes  wink  eusa_angel  eusa_boohoo  eusa_clap  eusa_dance  eusa_doh  eusa_drool  eusa_eh  eusa_hand  eusa_liar  eusa_naughty  eusa_pray  eusa_shhh  eusa_shifty  eusa_sick  eusa_silenced  eusa_snooty  eusa_think  eusa_wall  eusa_whistle   Pictures & Links

 
Custom on eBay
Previous / Next Custom Tutorial
Reaslistic Skin TonesSubmission OrderShoulder Joint Protection Part 2
Reaslistic Skin TonesCreated by DarththomasShoulder Joint Protection Part 2