LED Light-up Effects Custom Tutorial
This tutorial teaches you how to add an extra level of creativity and value to your customs by showing you how to add LED light-up effects!

Please wait...
A quick note: This article deals with properly installing an LED circuit in an action figure, and talks about how the electricity in a circuit flows (such as with the positive and negative sides of wires, etc.). It does not teach you how to solder said LED circuit. If you need to learn how to solder, please refer to my other tutorial which talks specifically, and in detail, how to solder. Thank you.
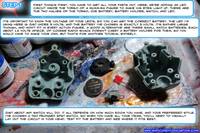
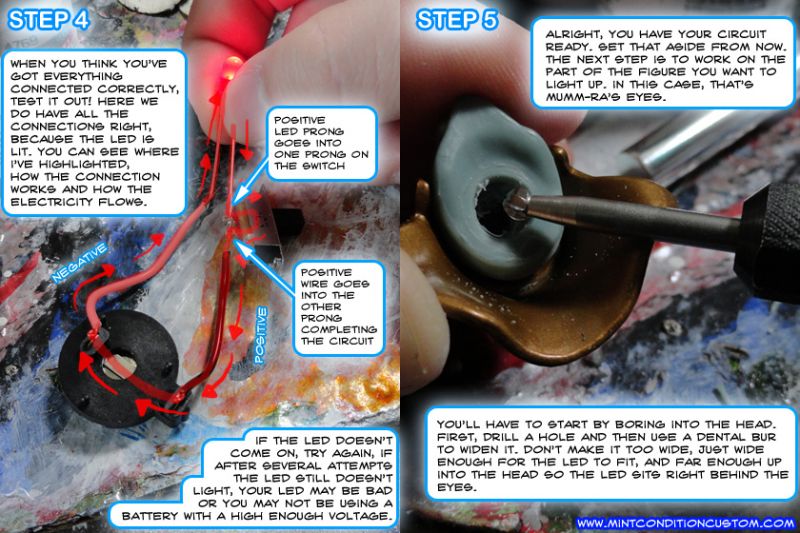
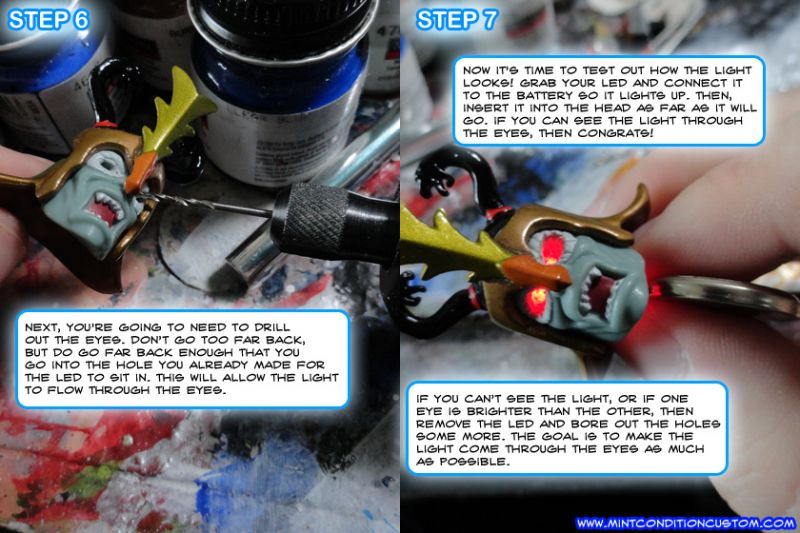
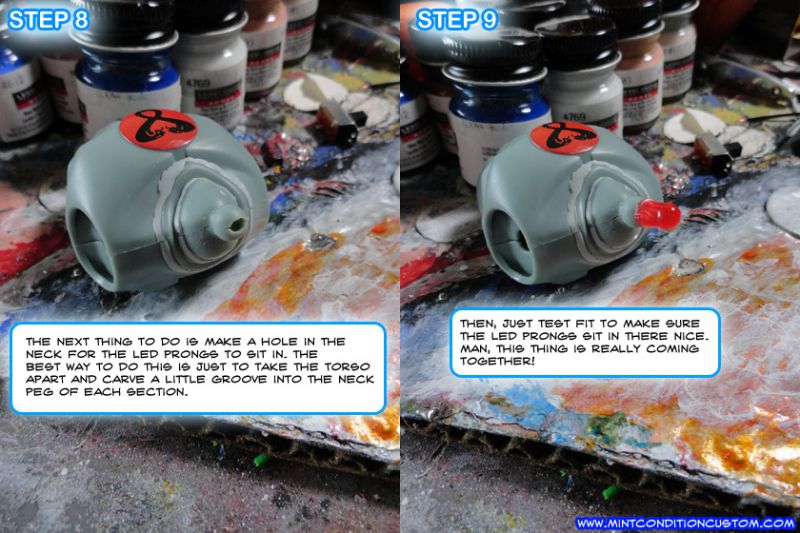
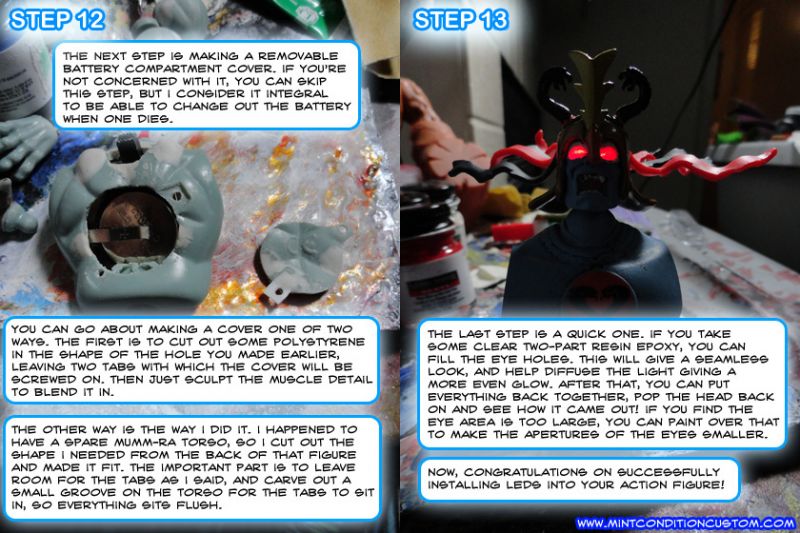
So, installing LED’s. It can really give some extra value to a custom, if you can make a part of the figure light up. For some characters, it’s almost essential. Here, I’ll teach you how to set up a circuit, and how to make it fit inside of an action figure to make it light up. I’ll even teach you how to make a removable battery compartment on the back for easy access to changing out the battery.
What you’ll need for this tutorial: an led, some wire, a switch, a battery, a battery holder, a dremel, supplies to solder, a lo-temp hot glue gun, and some two-part epoxy resin.
Alright, ready to get started? Let’s begin!
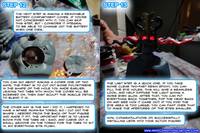
And that’s the end of the guide. I hope it helps!
Disclaimer
Customize at your own risk!
Customizing can be a fun, but dangerous hobby. These tutorials are contributed by other customizers. Some of the things recommended in the tutorials may be dangerous, such as the use of boiling water or sharp objects. You shouldn't attempt anything mentioned without adult permission and supervision. Figure Realm and/or the authors of the tutorials are not liable for any injuries or damages occurring from any attempt to follow suggestions in these tutorials.
User Comments
Custom on eBay
Previous / Next Custom Tutorial


 Update Your Tutorial
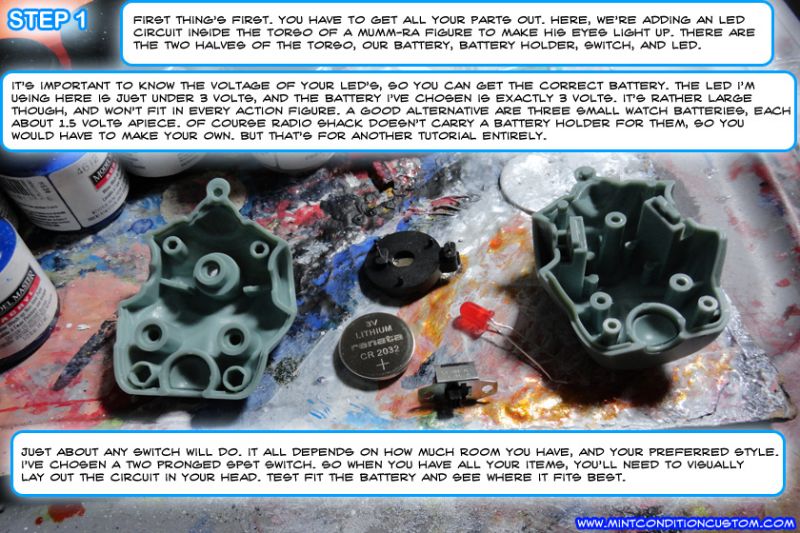