Color Dye Your Action Figures Custom Tutorial
How to color your action figure without paint to avoid paint rub
This custom tutorial was contributed by
Mono loco
Please wait...
This tutorial shows you how to color dye your action figure mainly when its an all black color character,or you just want some part of your figure painted black. Like all tutorials in this site you should be careful when handling sharp objects,tools or hot water which is what you would need. This is the second time I used this trick on a action figure,the first time I did DARKHAWK custom and it came out ok. The first time I used color dye was to color the faded seat belts on my car and it worked fine.
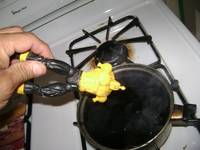
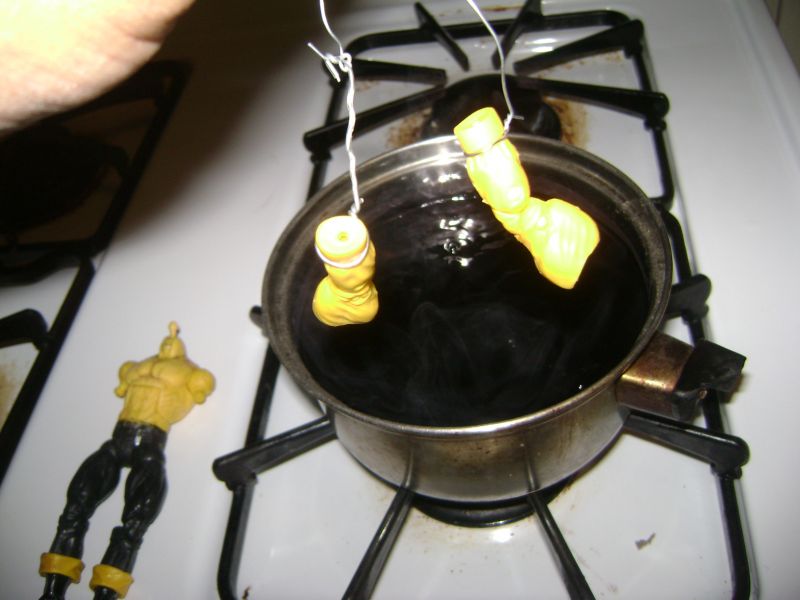
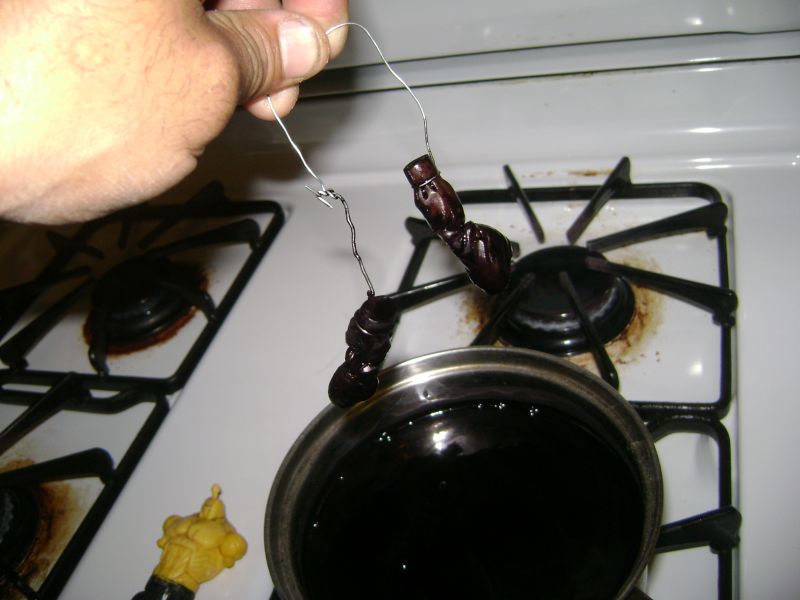
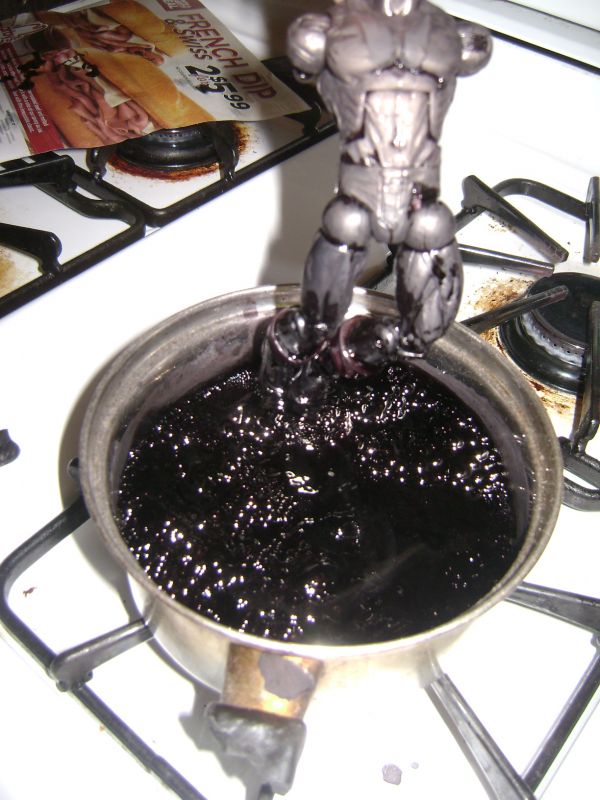
Materials needed,news paper because it gets kind of messy,some black color dye(liquid dye),empty glass jar to save what's left of your dye because you can use it again,an old pot,some wire to tie your figure or parts so you can dip it in the boiling dye.I did this trick because when your customizing an all black color character its very hard to prevent paint rub especially in the joints.
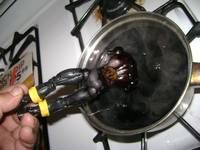
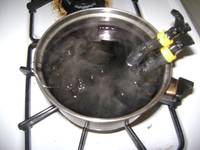
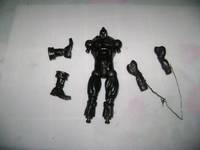
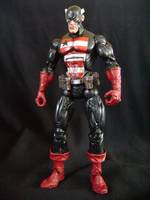
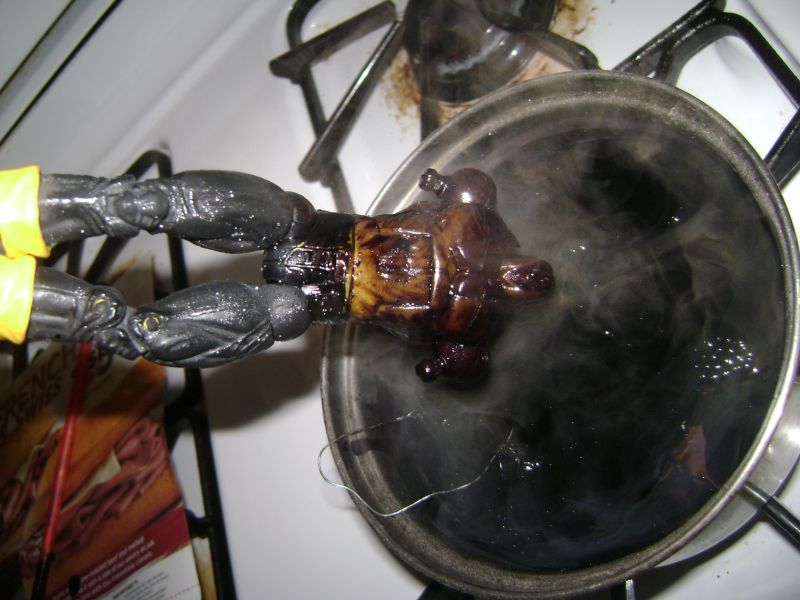
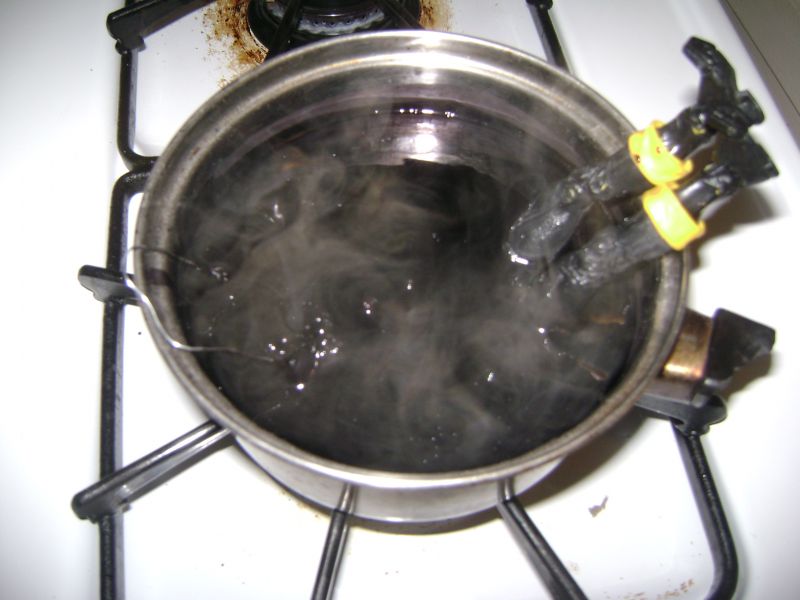
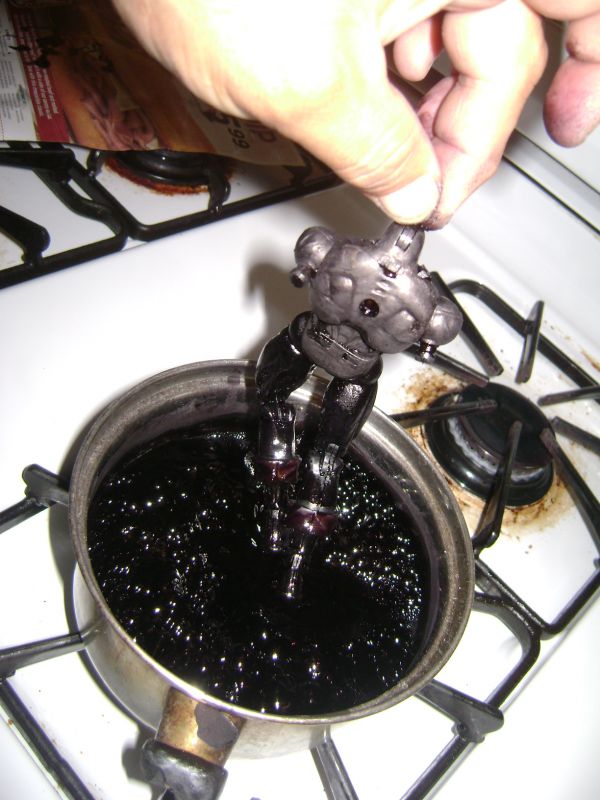
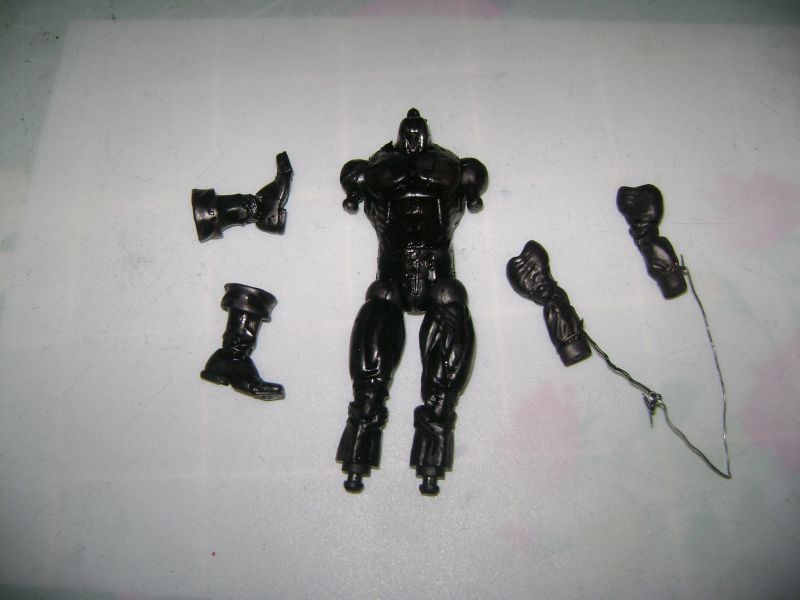
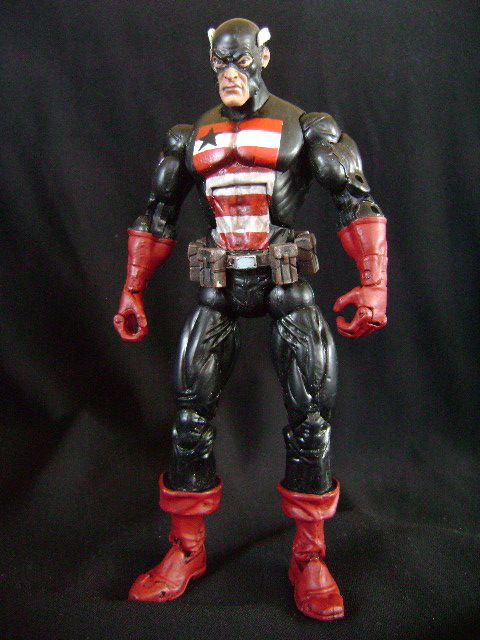
Prepare your dye in a small pot, mine is like a 16oz pot, the dye needs to to be kind of concentrated if you make it too diluted its going to take a long time to paint your figure I did about half of the bottle and about 12 oz of water and I added 1/2tsp of salt ,bring to a boil then dip your figure for a minute,(very important to remove all paint original or the one added by you and never leave the figure in the boiling dye for long periods of time you don't want your figure warping I say no more than one minute at a time). the soft plastic on your figure absorbs the color dye faster than the hard plastic so keep dipping your figure till it gets to the color tone you like, take your figure out once in a while,cool it with tap water then bend all the joints so the color dye gets in there good,dip again and repeat until all the joints are colored black. When your satisfied with the color tone on your figure wash it really good with dish washing soap and an old tooth brush and there you have it. I guess this technique can work with other color of dye as long as you go from a light color plastic to a darker color dye. I haven't tried it with other color but if someone does it let me know how it work for you,hope this helps thanks and God bless. THE CUSTOM on this tutorial is a US AGENT.
Disclaimer
Customize at your own risk!
Customizing can be a fun, but dangerous hobby. These tutorials are contributed by other customizers. Some of the things recommended in the tutorials may be dangerous, such as the use of boiling water or sharp objects. You shouldn't attempt anything mentioned without adult permission and supervision. Figure Realm and/or the authors of the tutorials are not liable for any injuries or damages occurring from any attempt to follow suggestions in these tutorials.
User Comments
Custom on eBay
Previous / Next Custom Tutorial


 Update Your Tutorial
I tried this on a Marvel Universe figure a while ago, and while the results looked great when it was done, once I painted the figure the black dye started to seep through the paint, ruining the whole thing.
I also dyed some other rubbery and resin parts at the same time, and they were fine, so it's been hit and miss for me.
1. wash the figure with dish soap and water, get all the factory molding grease out, it could prevent the dye from sticking
2. use thinner to strip away as much of the factory paint as possible, paint is another layer of polymer that interferes with the dye taking sometimes. brush thinner on to strip the paint, then drop the figure in a bucket of water to kill the chemical reaction to prevent the thinner from dissolving too much of the figure beyond the paint. The paint and figure are both polymers that react with paint thinner. therein lies the complexity.