Extending Neck Pegs Custom Tutorial
An easy and simple mod to fix those short, stubby necks.

Please wait...
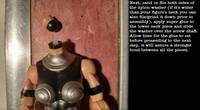
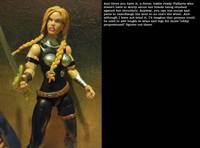
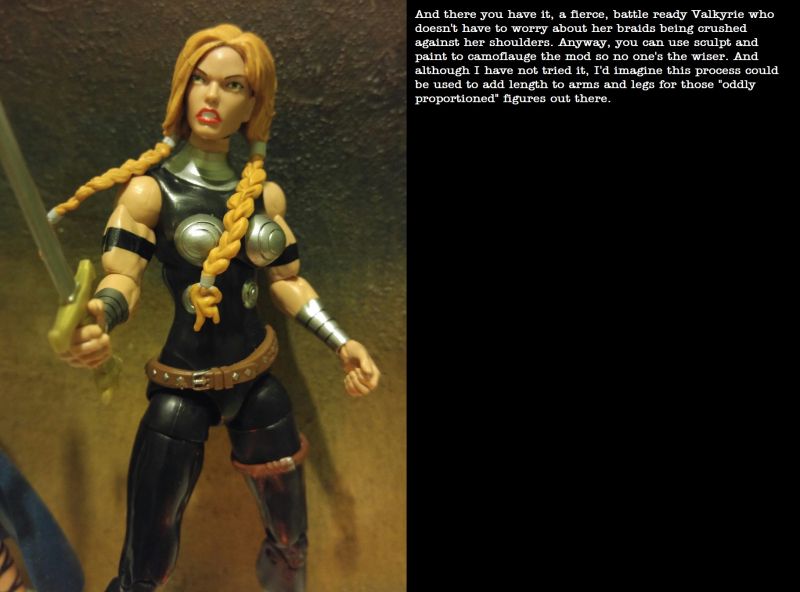
Swapping out heads on figures is one of the more basic modifications out there, but occasionally there will be a figure with an overly short neck peg and nearly every head you try sits low and looks like it's attached at the shoulders. I recently decided to swap out the Marvel Infinite Thundra head on an extra Valkyrie but found that head sat too low on the neck. I performed the following mod to extend the neck peg and fix the problem.
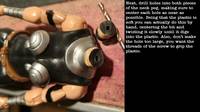
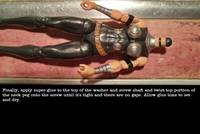
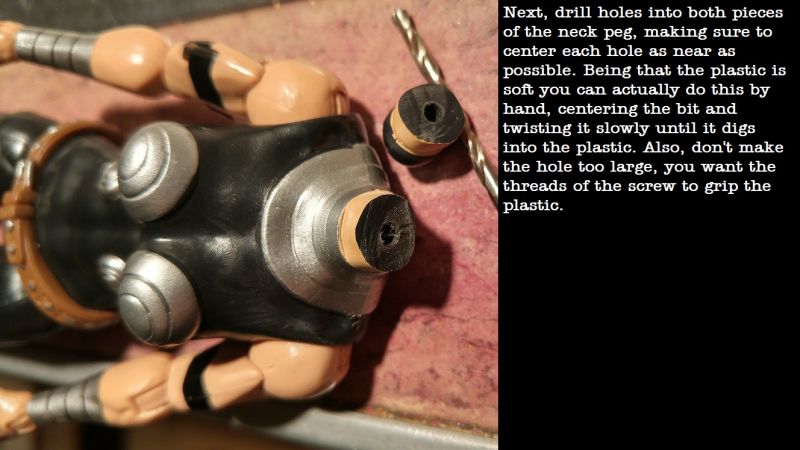
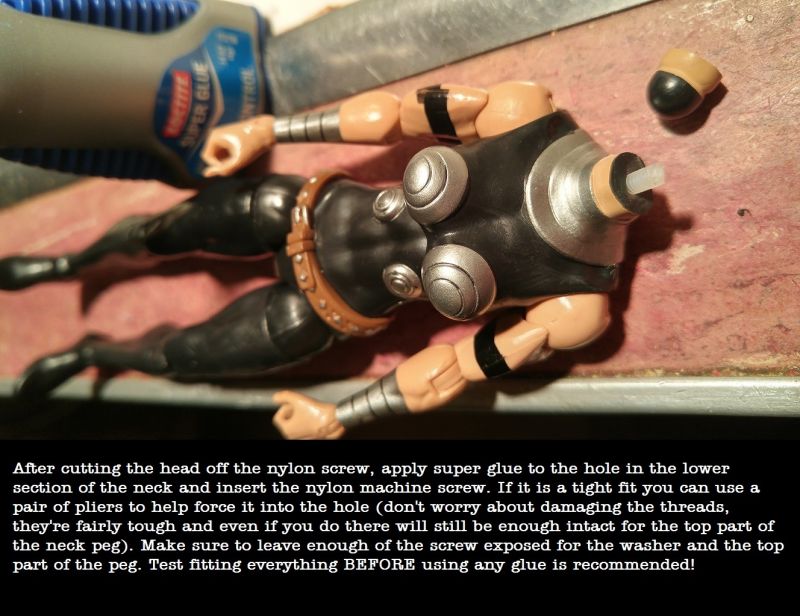
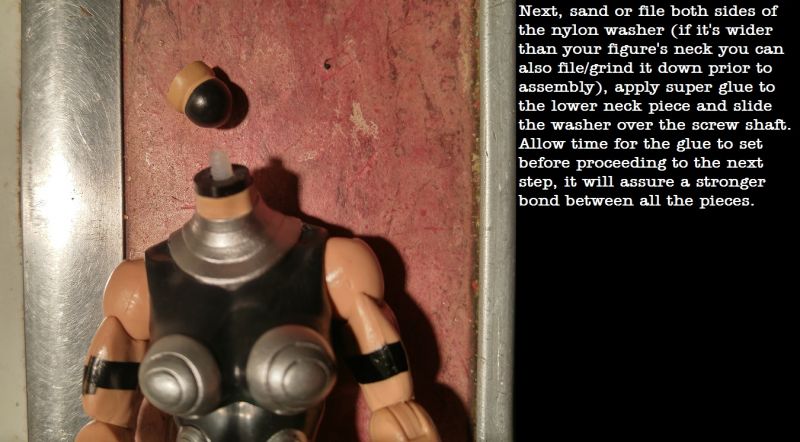
tools and materials you will need: Xacto knife or razor blade, small drill bit, pliers, super glue, nylon machine screw and nylon washer (these should be sized according to the figure, most male figures will need a larger screw/washer combination, female figures smaller).
This neck extension mod obviously only applies to figures with soft plastic upper torso pieces, but, as stated, could be adapted to add length to arms and legs as well. Hopefully this tutorial proves useful to fellow customizers out there. Cheers.
Disclaimer
Customize at your own risk!
Customizing can be a fun, but dangerous hobby. These tutorials are contributed by other customizers. Some of the things recommended in the tutorials may be dangerous, such as the use of boiling water or sharp objects. You shouldn't attempt anything mentioned without adult permission and supervision. Figure Realm and/or the authors of the tutorials are not liable for any injuries or damages occurring from any attempt to follow suggestions in these tutorials.
User Comments
Custom on eBay
Previous / Next Custom Tutorial


 Update Your Tutorial
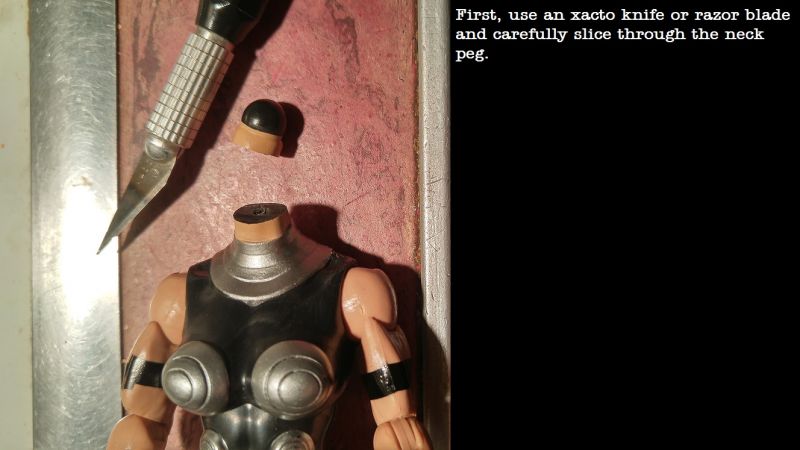